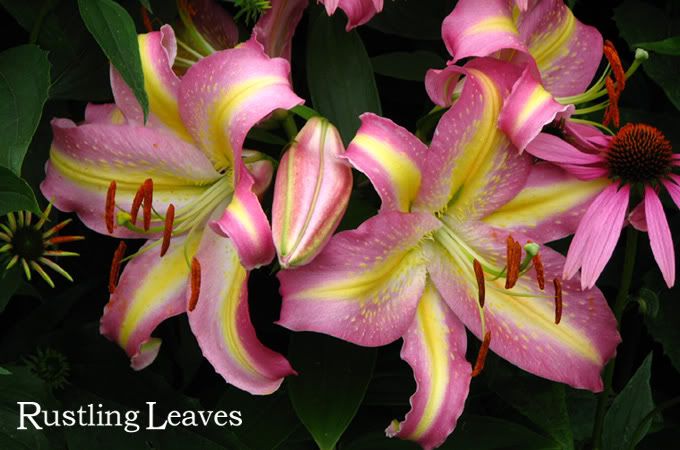

I was never satisfied with the stock writing and pictures for headers that come with most blog templates. There are a millions, if not jillions, of blogs out there and I decided to create my own headers to differentiate myself and stand away from the crowd. Interesting photographs of my area, gardens, and what is going on in my life were what I wanted to incorporate into my design. But I also wanted continuity and a sense of familiarity to be part of it too. The results are what you see every time you visit. I’ve added variety by changing them monthly and keeping them seasonal in subject. I have a lot of fun creating them and want to share them with you.
I use a graphic editing program that supports layers to create my headers. Supporting layers is the key. If you are familiar with glass painting, where layers of paint are built up to create an image on the reverse side, then you will begin to understand the usefulness of layers when creating an image. I use Photoshop Elements 1.x because I am familiar with its capabilities and it was the bundled software that came with my scanner. PS Elements has gone through many iterations, currently at 5.x, since I purchased mine but it is adequate for the work I want to achieve and my ability level. Any image-editing program that supports layers will work.
The other reason I like to use PSE is because of its proprietary format for saving files, using the file extension PSD. This file format, like RAW, TIFF, and others, saves files with no or little loss in image quality. This is very useful when creating images and allows a great deal of manipulation. The files created are large so I convert them to condensed files like JPEG, GIF, ICO (for icons), or PNG (the new Vista standard for icons) when I am finished and ready to upload them to the Internet. Other programs will also do file conversions but I have found PSE to be the best for me in retaining the sharpness of the original.
Thanks to Kathy for suggesting this post a long time ago. I had no inkling it would take such a long time to write plus make the screen captures.
This tutorial is going to be long and very graphic intensive so another window will open after you Click Here To Go To Header Tutorial..
Friday, March 02, 2007
Header Tutorial
Subscribe to:
Post Comments (Atom)

0 Comments:
Post a Comment